WooCommerce integration is one of those areas where Bricks often gets criticised. With the Bricks 2.4 beta, the new Woo Setup Wizard tackles some of the repetitive work involved in getting a store’s templates up and running.
It can create the key templates, put the relevant elements in place and configure the conditions that determine where those templates appear. That leaves you with a starting point to customise rather than a collection of blank layouts.
Before going any further, though: this is a beta release. Do not use it on a live site. The advanced modular elements covered below are also experimental. Keep your testing separate from your production store, and refer to the Bricks 2.4 beta release notes for the release details.
What You'll Learn
- The Woo Setup Wizard creates editable store templates and configures their display conditions automatically.
- Generated layouts provide native Bricks elements, but still need your own classes and styling.
- Advanced checkout options require experimental modular elements, and the beta should not run on live sites.
What the Woo Setup Wizard Actually Does
On a fresh WordPress installation with WooCommerce and Bricks installed, there is a new Woo Setup Wizard entry under the Bricks menu in the WordPress dashboard.
The wizard organises setup into five main areas:
- Shop: the product archive template.
- Single product: the template for individual product pages.
- Cart: the shopping cart page and its associated layout.
- Checkout: checkout and its related templates.
- My account: the customer account area.
You do not have to complete all five. If you only need help setting up a particular area, you can work on that section and leave the others alone.
The important distinction is that this is one-click setup, not one-click design. It creates the structure and applies the relevant Bricks settings, but it does not produce a finished, branded shop. You still need to add your classes, styling and design decisions.
For testing, I used a completely clean installation with WooCommerce sample data. That makes it easy to see exactly what the wizard creates without existing customisations getting in the way.
Create the Shop and Single Product Templates
Start with the shop archive
Expand the Shop section and you can check its setup status, access the WooCommerce shop page, open it in WordPress or inspect it on the front end. The wizard also shows whether a Bricks template is associated with that area.
On a fresh installation, there is no existing Bricks archive template. The process is straightforward:
- Open Bricks → Woo Setup Wizard.
- Expand the Shop section.
- Select One-click setup.
- Read the confirmation message and confirm the operation.
Do pay attention to that confirmation. For the shop setup shown here, Bricks warns that it will create templates and configure the shop page, draft existing templates for that area and modify existing page content. This is not a button to click casually on an established build.
Once complete, the wizard reports that the product archive template has been created. Open Bricks → Templates and you will find the generated archive, with its template conditions already configured.
Inspect the generated layout
Opening the archive in Bricks reveals a basic layout built with native Bricks elements. It includes the section and container structure, the post title, breadcrumbs, archive description and products.
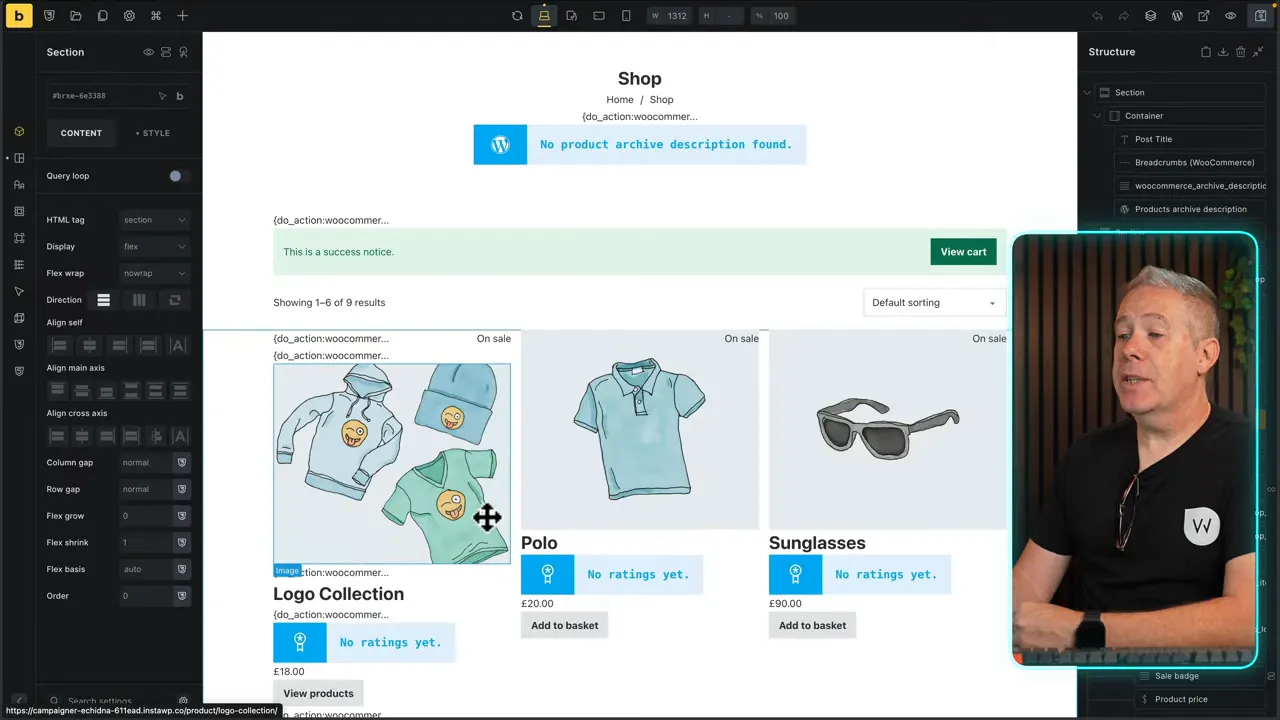
That is where the time saving comes from. You are not manually assembling the same starting structure, adding all the relevant elements and then assigning the template. The wizard has handled that repetitive work for you.
It is still a basic starting point, and that is worth emphasising. You will need to go through the layout and apply your own classes and styling rather than treating it as a finished design.
Repeat the process for single products
The Single Product section follows much the same pattern. Initially, it reports that no Bricks template has been found. Use One-click setup, confirm the operation and Bricks creates the single product template.
There is also a separate setup action. In the example shown, that action explains that it will create a new template while leaving existing templates active. That is different from the broader one-click setup warning, so read the confirmation for the action you are actually taking.
Once the single product template is created, you can continue with Cart, Checkout and My Account as needed.
Checkout Setup Includes the Related Templates
Checkout is a little more involved than a single product page because it has several related screens. The wizard exposes those pieces rather than treating checkout as one isolated layout.
Alongside the WooCommerce checkout page, you can access Bricks templates for checkout, thank you, payment and order receipt. Each relevant entry provides options to set it up again, edit it or preview it.
Choose Edit with Bricks for the checkout template and it opens directly in the builder. From there, you can make changes just as you would with any other Bricks layout.
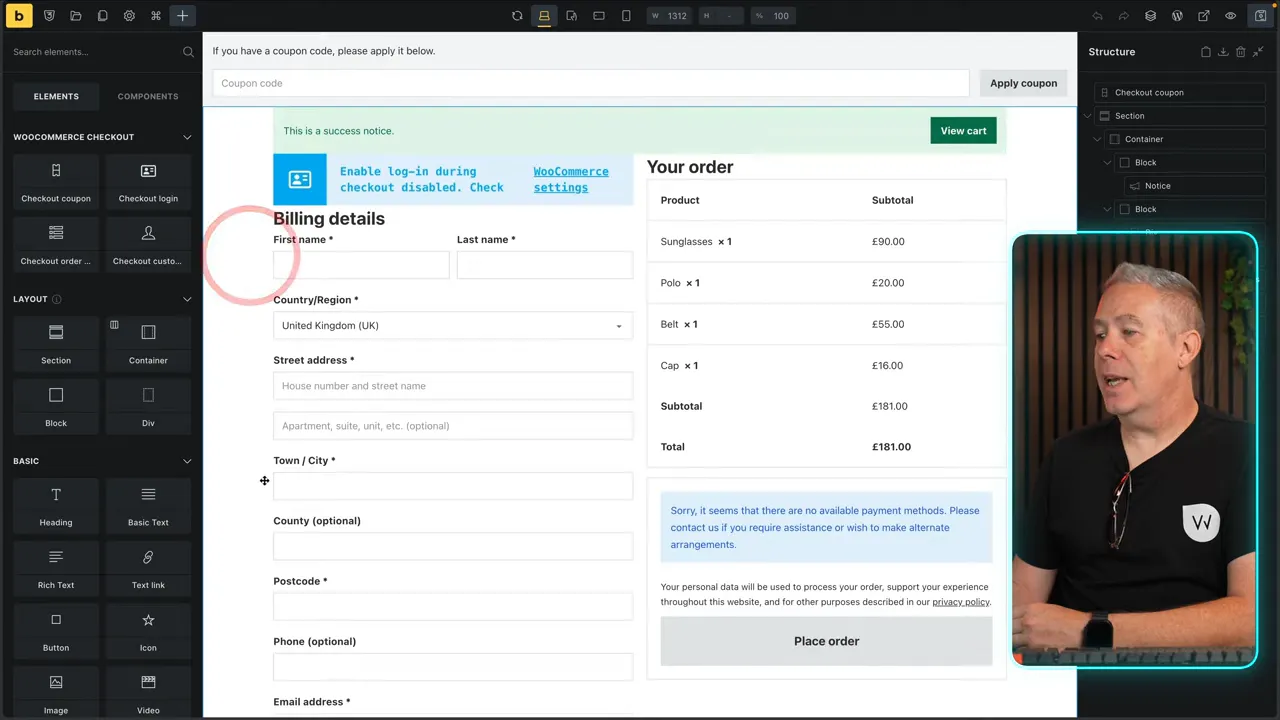
The same applies to the thank-you template. Without an order available, its preview will not display a populated order confirmation, but the Checkout Thank You element is there for you to work with.
All the generated layouts also appear in the main Bricks Templates area. They remain fully editable, and the wizard has already configured the conditions controlling where and when they are used.
That gives you two useful ways to work: return to the wizard to manage a particular store area, or use the familiar Templates screen to open the layouts you want to customise.
Choose Standard or Advanced Checkout Setup
The checkout section also provides a choice of setup types:
- Standard V1
- Advanced V2
- Advanced multi-step V2
To use the advanced options, you first need to enable the advanced modular elements. These are marked as experimental, so treat them accordingly.
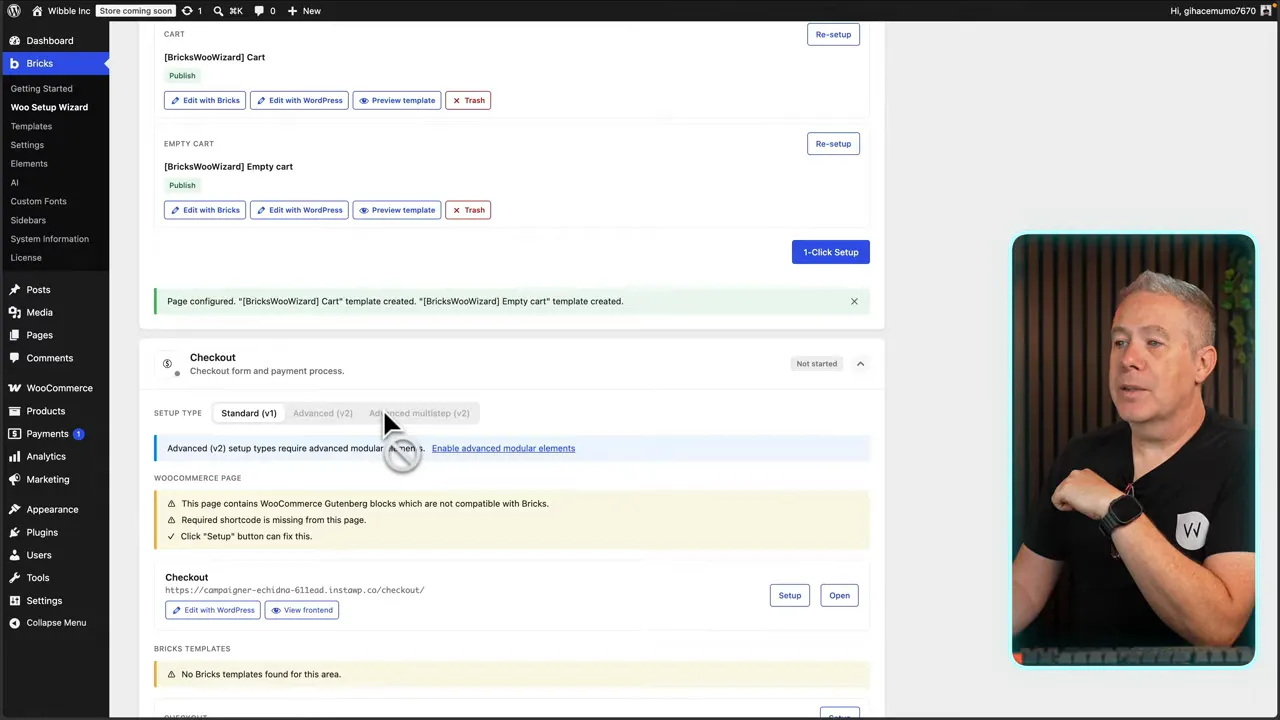
The settings also include options to enable the Bricks WooCommerce checkout coupon element and checkout login element.
After enabling the relevant settings, return to the wizard. The cart offers standard and advanced setup choices, while checkout provides its available versions, including the advanced multi-step option.
Select the version you want, run one-click setup and confirm the changes. If content already exists, Bricks asks whether you want to replace it. In the example here, that means updating the existing setup rather than creating duplicate templates.
That confirmation is useful, but it still deserves your attention. If you have already customised the generated content, check what is about to be replaced before continuing.
The Real Benefit Is Less Repetitive Configuration
For me, the strongest part of this update is not the appearance of the starting layouts. It is how much of the template configuration it removes from the initial setup process.
You get the relevant elements, editable templates and their display conditions without having to build and connect every piece manually. You can then spend your time customising the store instead.
If you already work with a style guide, CSS classes and variables, this becomes particularly useful. The wizard provides the structure, and your existing design system gives you a quicker route to making that structure fit the rest of the site.
It does not remove the need to design your WooCommerce store. It removes some of the tedious work you would otherwise do before the design work can properly begin.
I Would Like to See This Extend Beyond WooCommerce
I would also love to see this kind of integration for FluentCart, either built directly into Bricks or developed by the team at WPManageNinja.
FluentCart has a much smaller installation base than WooCommerce, but I find it a faster, more flexible platform that needs fewer extra plugins. A comparable setup workflow could make the process of building its store templates in Bricks much quicker and less painful.
For WooCommerce, though, this is a welcome improvement. If the initial template setup has been one of your frustrations with Bricks, the 2.4 beta gives you a much more convenient starting point. Just keep the distinction clear: the wizard handles the setup; you still control the design.


